Simplicity Classroom
Simplicity is my all-time favorite pattern company. Although I've used McCalls, Butterick, Vogue and many others, I've always preferred Simplicity - the name basically says it all. Beings I'm such a Simplicity fan, I signed up for an email sewing newsletter and got a fresh issue this morning. Well, you gotta check out the Simplicity Classroom! Following the links, I came upon a page of free sewing projects and a page of free quilt patterns. There are also links on the left of each page to many other pages full of valuable info for those of us sewing and quilting with kids, such as Sewing 101 and Quilting Tools Tutorials. So get a cup of tea and spend a little time seeing what all the Simplicity site has to offer.

Perfect Sewing Machine for Kids?
 |
| Sewing at Granny's! |
Simple and Durable
The perfect sewing machine for a child has to be simple and durable. At the top of my list is a drop in bobbin. I didn't appreciate how important this feature is until I had to deal with the other kind. I've been sewing since I was small and always had a machine with a drop in bobbin. Even as an adult, correctly inserting the bobbin into the little do-funny and then trying to maneuver the thing into the correct position at an awkward angle is more than I can handle. Sewing should be fun! So why make it difficult? Anyway, the drop in bobbin is a non-negotiable.
Other desirable features include zigzag, convenient reverse and easy threading. To this end, an automatic needle threader would also be nice but not essential - after all, young eyes can see the eye in the needle. In fact, I can still thread a needle manually when I have to and it may actually be good for enhanced eye-hand coordination. So an easy thread path, but not necessarily a needle threader, is in order. On the reverse, I like to sew backwards at the start and end of each seam so want reverse to be easy to get to.
Durability is a no brainer - this is for a child. Gone are the days of bullet-proof machines as the standard. So why don't I just get vintage machines? Been there, done that and they're just too heavy and temperamental for my purposes. I actually gave one of the granddaughters a 1947 Singer in a cabinet but it has proved cumbersome and difficult for her to operate on her own. In fact, she is the reason for this quest - she'll be 10 in March and I want her to have a machine she can use at will without needing assistance.
Should Kids Have Their Own Sewing Machine?
I say absolutely! My daughter had a sewing machine of her own in her room from about age 8 or so. She also had her own fabric stash and sewing supplies and could sew whenever she wanted. Not only is sewing a wholesome activity, it's also a practical skill that too few children learn these days. In addition, having the freedom to create with fabric (and make and correct mistakes) provides valuable experience in math, measuring and other areas. Have I convinced you yet?
So Which Machine is Best?
I've just begun my preliminary research so don't have an answer yet. I'm partial to Singer but am not sold on it as the best option at this point. I've looked at the basic models in the store and read through reviews online and there seems to be quite a bit of dissatisfaction with the reverse lever and durability. I wasn't able to actually test drive any of the models while at the store but will do so once I've narrowed down my choices. At any rate, I'm just starting this quest so am open to suggestions. I'd like to keep the price to $100 or less. Anyway, if you have an opinion on this subject, please chime in - I need all the help I can get!
Fleece Poncho to Make with the Kids
 |
| Photo courtesy of //Between the lines// |
Great Gift Idea, Too!
I’ve actually got a bunch of fleece I bought on sale for kid-quilt backs. Now I’m thinking maybe I should make some ponchos instead. With several grandkids in snowy places and Christmas right around the corner, they might come in real handy. And speaking of gifts, the poncho is the first in a series of DIY gift ideas so check out the others while visiting Between the Lines. And if that isn’t enough, look at all the posts labeled Sewing with Kids.
How to Make Quick and Easy Handprint Potholders

Handprint potholders are a quick and easy project for kids that also make a great gift for Christmas or any other occasion. You can use a layer or two quilt batting or old sweatshirt material as padding and insulation. You can also buy special heat-resistant material such as Insul Bright to use with one layer of batting. To make this project even more enjoyable for kids, pre-cut your fabric pieces so that the little ones can get right to the fun part of sewing.
Tools
- Pencil
- Scissors
- Ruler or measuring tape
- Iron and ironing board
- Pins
- Sewing machine
- Thread
- Hand sewing needle (optional)
- Plastic ring (optional)
- Fabric pens (optional)
- Heavy duty fusible web (I prefer Heat n'Bond Ultrahold)
- White or light colored fabric for background
- Contrasting fabric for handprint
- Coordinating print fabric for border and backing
- Quilt batting or sweatshirt material
- Heat-resistant material (optional)
- One piece of fabric large enough for you child's handprint
- One 8 inch square of background fabric
- Two 8 inch by 2½ inch strips of print fabric
- Two 11 inch by 2½ inch strips of print fabric
- One 11 inch square of print fabric
- One or Two 10 inch squares of batting or other insulating material
Make Your Handprint Center Square
- Place your child’s hand flat with fingers spread on the paper side of the fusible web and trace carefully around the palm and fingers with a pencil. Cut out the handprint in an oval shape staying at least ¼ inch from the drawn line.
- Place the handprint, paper side up, on the wrong side of the fabric. Fuse in place with your iron, following the manufacturer’s instructions. Cut out the handprint on the drawn line.
- Peel away the paper from the fabric handprint to expose the adhesive. To make this part easier, drag the point of a pin across the middle of the handprint to score the paper and ten peel the paper away from the center to the edges.
- Lay your background square right side up on the ironing board. Position the fabric handprint, adhesive side down, in the center of your background square. Fuse the handprint in place with your iron, following the manufacturer’s instructions.
- Right sides together, align a long edge and the ends of an 8 inch border strip with one edge of the handprint square and pin into place. Sew from one end to the other, ½ inch from the edge. Follow the same procedure to attach the other 8 inch border strip to the opposite side of the handprint square.
- Fold the border strips away from the handprint square and press the seams flat with your iron. Avoid ironing over the fused handprint as too much heat may compromise the adhesive.
- Right sides together, align a long edge and the ends of an 11 inch border strip with one unfinished edge of the handprint square and pin into place. Sew from one end to the other, ½ inch from the edge. Follow the same procedure to attach the other 11inch long border strip to the remaining unfinished side of the handprint square.
- Fold the border strips away from the handprint square and press the seams flat. Again, avoid ironing over the fused handprint.
- Lay the handprint block face down on the right side of the backing fabric square and pin around the edges. Sew around the perimeter ½ inch from the edge, leaving a 5 inch opening on one side.
- Trim away the fabric within the seam allowance diagonally across the corners to remove excess bulk. Be careful not to cut through the stitching!
- Turn the potholder right side out through the opening. Reach inside the potholder and poke your finger into each corner to push the corners out nice and square.
- Iron the edges of the potholder. Fold the fabric along the opening to the inside, even with the seam, and press a sharp crease on both edges.
- Put the batting inside the potholder through the opening and smooth it neatly into place. Tuck the batting under one fold of fabric inside the opening. Pin through all layers around the edges of the potholder to keep the batting from shifting.
- Sew around the perimeter of the potholder, ¼ inch from the edge. Sew around the potholder again, following the seam line between the border and background fabric.
- Hand stitch a plastic hanging ring to one corner for hanging, if desired.
- Have your child write his name and the year (and add other embellishments) with fabric pens, if desired.
Simple Homemade Sewing Cards

Tools
- Ruler
- Pencil
- Scissors
- Hole punch
- Small plate (to make the circle)
- Iron and ironing board (fabric covered cards only)
- A piece of cardboard (I used a Minute Rice box)
- Colorful fabric and heavy-duty iron-on fusible webbing, or paper and glue
- Yarn
- Tape or plastic sewing needle
- Cut the fabric or paper to 8 inches square. If using fabric, fuse iron-on webbing to the back of each square following manufacturer instructions.
- Fuse the fabric or glue the paper to the cardboard.
- Draw your shape on the back of the cardboard and cut it out.
- Punch holes all the way around the shape, about ½ inch in from the edge.
- Cut a piece of yarn and tie one end to a hole. Wrap the other end with a small piece of tape or tie on a plastic needle.
Tips
- Pretest the hole punch on the cardboard to make sure that you can actually punch holes. After punching several sewing cards, I had to turn punch duty over to my hubby.
- Use plain paper on one or both sides of your sewing cards and let the kids draw pictures and color them.
 I also made a sewing card for the little guy with a racecar cut from fabric. Which do you suppose will be his favorite?
For additional ideas, check out some other simple sewing projects for kids.
Find a Variety of Kids Crafts in the Wrights Classroom Online
Wrights brand trims have been around as long as I can remember. As a child, my favorite trim was rickrack – and I still have a bunch! Anyway, I found the Wrights Classroom online which has a variety of craft projects for kids.
UPDATE: Unfortunately, the Wrights classroom has disappeared so I deleted the broken link. The Simplicity Creative Group classroom has lots of projects, however, and seems a good replacement for the Wrights classroom (Wrights appears to be part of the Simplicity Creative Group now?). Here's a banner link (affiliate, btw) for your convenience. Once you're on the site, just click on Classroom & Free Projects on the lower left side of the homepage.
Simplicity is absolutely my all-time favorite pattern manufacturer, so I feel confident recommending the site. I had a look around and there's a ton of info you need to see! I'd give links to my favorites but I've learned my lesson - I don't want a bunch more broken links on this site just because other sites that I've linked to change. So just head on over there and check it out. The site is easy to navigate and has a lot of free projects that would be perfect for kids. Isn’t the Internet great?
Make an Easy Tied Quilt with Kids
 A tied quilt made from a single piece of flannel and a single piece of fleece is the perfect project for kids. Even little ones can make a quilt with this simple method. Whip up a few warm and snuggly quilts to give as Christmas gifts or to enjoy at home during the cold winter months.
I made one of these quilts with a matching pillow for my son a couple of years ago. I also published How to Make a Simple, Luxurious Quilt with step-by-step instructions and a few detailed pictures. I used furry fleece and a flannel sheet – isn’t it beautiful? And no batting needed! What could be easier than that? Be sure to buy an even plaid so that you have a nice grid for your ties - or recycle an old plaid flannel sheet like I did.
So gather your materials and a kid or two, and get started, ok?
Sewing Books for Kids
I happened upon a nice eHow article titled "Books on Sewing for Children." Rather than reiterating the info presented in the article, I’ve just posted Amazon links to the recommended books. I don’t currently have any of these but think I may add a couple to my library!


Stitching Items for Kids at WildernessCrafter.ArtFire.com
Update: The following items are sold and I have closed my ArtFire shop.
 I have an ArtFire shop under the name Wilderness Crafter. Currently I’m focused on de-stashing and sending no-longer-needed items off to new homes. It occurred to me that I have a few things in my ArtFire shop that are perfect for kids! So I’m giving the info and links here. As the items find new homes, I’ll update this post.
 I have an ArtFire shop under the name Wilderness Crafter. Currently I’m focused on de-stashing and sending no-longer-needed items off to new homes. It occurred to me that I have a few things in my ArtFire shop that are perfect for kids! So I’m giving the info and links here. As the items find new homes, I’ll update this post.
Teach Me to Stitch is 22 pages with easy step-by-step instructions for 15 beginner cross stitch projects plus full color diagrams and photographs.

Baby Bonnie is a hard-to-find McNeil Puppet Doll kit from 1984 (which makes it “vintage” – how cool is that?) Bonnie is 14 inches tall and can be a puppet or a doll. The kit is unopened and contains everything you need except for thread, scissors and stuffing.

Star Studded Iron-On Transfers are super cute designs for use on kids’ clothing but would also be perfect on a crayon quilt or other project. Although designed for use with fabric paint and markers, you could use the transfers for traditional embroidery or as hand or machine-sewn applique patterns.
Simple Sewing Projects for Kids
 Do you remember sewing cards? As a child, I loved to hand stitch with yarn or a shoelace through holes punched around some simple shapes. It wasn’t long until I was embroidering with a real needle and floss, and sewing by machine. The beauty of sewing cards is that you can use them again and again – simply take out the stitching. Even toddlers can learn to sew with sewing cards. What a great way to occupy the little ones and let them feel a part of the action while you’re sewing!
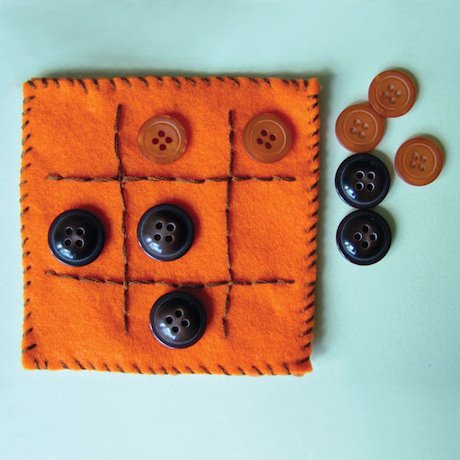
I ran across a web page by Scholastic with several simple sewing projects that will be perfect during our shorter days and winter weather. Beings I don’t have any wee ones here, I think I’ll dig through my stash of fabric and supplies and make take-along sewing kits to send to the grandkids. For the smallest ones, simple sewing cards with shoelaces – no needle required! For the older ones, I think the tic-tac-toe game will be perfect.
So check out the projects and browse the site for other cool craft ideas. Then gather up your scraps and other supplies and have some fun with the kids! If you don’t have the supplies on hand or would just rather buy a pre-made kit, here are some Amazon.com craft kit links.


Crayon Quilts are a Great Project for Kids!

I love crayon quilts! How fun for kids to color pictures and then see them on a blankie. Many years ago, my daughter’s preschool class created a crayon quilt to raffle as a fundraiser. I bought five tickets, one for each child, and my preschool daughter won! Over two decades later she still treasures that quilt.
I recently received the following question by email and would like to share my response.
Question:
Are crayon quilts made using crayons, or is it just the name used because of the look of the pictures?
Yes, crayon quilts are made using crayons. You can use regular crayons on 100% cotton fabric but need special fabric crayons when using a fabric that contains synthetics such as a cotton/polyester blend.
Here are a few links that might be of help:
Although a crayon quilt is washable once the crayon is properly heat-set, to better preserve the colors and detail you might want to reserve this technique for items that won't require frequent laundering. Enjoy your project!
 I encourage you to make a crayon quilt with your children or grandchildren. If a full quilt is too much to take on, make small individual wallhangings instead. Also, consider organizing a class project to raise money for your local preschool. You’ll be glad you did!
If you need ideas or step-by-step instructions for working with a group of children, get a copy of Creative Quilting with Kids by Maggie Ball.
Subscribe to:
Posts (Atom)